
Showing posts with label DIY Taste. Show all posts
Showing posts with label DIY Taste. Show all posts
Jan 31, 2011


Jan 25, 2011
Parasols
You see them in so many outdoor weddings and they look so cool. But if you're like me, you think "Meh, do I really need this? Probably not." Well, about two weeks before the wedding, I started thinking about how our wedding was in an ENORMOUS park space and all the cute pinwheels and cranes we had labored over making could get lost in the vast, green expanse. I decided that I needed more big, colorful things floating around and parasols fit the bill. So, I ordered twenty parasols from Jadetime.com and bought a shiny red bucket at IKEA to hold them.
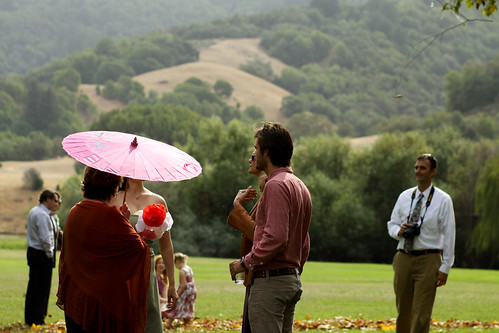 |
| Guests milled around with a little sun protection |
But let's just take a moment to enjoy a range of cute parasols looks and some other ideas for how to use them...
 |
| Color-scheme focused in this wedding on Ruffled |
 |
| Eclectic and vintage in this wedding on Ruffled. Umbrellas from Bella Umbrella. |
 |
| Include a small sign to encourage guests to join in, like this wedding on Ruffled |
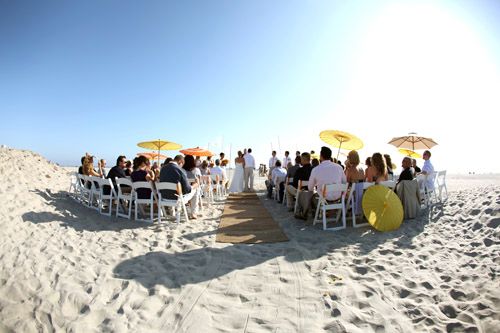 |
| Sometimes, parasols are just plain practical, like in this beach wedding on Snippet & Ink |
Jan 18, 2011
Pinwheels, Part 3
What would I do without GB? I love her weekly doses of DiY inspiration! She made the cutest pinwheels for her wedding, and here she offers instructions for pinwheel boutonnieres.
Did I mention that there are A LOT of pinwheel ideas out there? This time, we're going to talk about pinwheel boutonnieres. Since the girls would have pinwheels in their bouquets, it seemed like a wonderful balance to have the guys wearing a pinwheel on their lapel (or suspenders, in our case).
This wedding on Ruffled featured lots of pinwheel ideas, but in my notes its the only one with boutonnieres. And if you're not into making them yourself, this bride sourced from Twirlie Whirlies - yay! Etsy!

I found some neat, old-fashioned looking brass buttons in the discount section of Britex Fabrics, which also supplied the pin backings and an industrial strength glue. You can find my detailed how-to in my Ruffled DIY Contest entry.
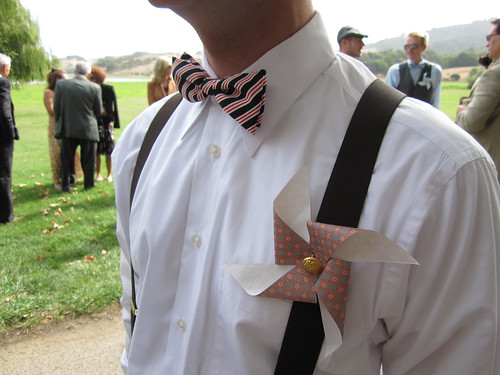 |
| Photo credit: Torrey M F |
Jan 14, 2011
Secret Beds
This is my second look at some ideas on how to arrange small spaces for my friend, Angela's possible new Hong Kong digs. It seems to me that a big part of living in cramped quarters is trying to carve out a little space for yourself, so that when your guests come over you don't feel like they have the whole run of the place but so that they're also not so cramped.

 A little less obvious, but possibly more time consuming (and probably requiring a hammer, some wire, and some of those screw with little hooks on them) is hanging art as a little improptu wall. Doesn't this look super modern and fresh?
Curtains clearly seem to be one of the easiest ways to hide your bed. And if you have an architectural detail that helps with that, so much the better.
A little less obvious, but possibly more time consuming (and probably requiring a hammer, some wire, and some of those screw with little hooks on them) is hanging art as a little improptu wall. Doesn't this look super modern and fresh?Shelving is also a commonly used solution to break up two walls. The woman in the apartment below, made a custom thin shelf to turn the little dining area into a bedroom.  I know that a murphy bed is a little beyond your basic DIY, but I just thought the beautiful wood (fake) on the example below was proof that murphy beds can actually be hidden and can even look classy.
  Okay this last one is probably also beyond the reach of a lot of basic DIY-ers but it was so clever, I had to include it. Basically the bed is set off from the rest of the room by a large screen on which he can project films to watch either from his bed or from the couch. Despite how sophisticated this is, it got me thinking that actually an old projection screen could make a great room divide.
  via. 1, 2, 3, 4, 5, 6
I know that a murphy bed is a little beyond your basic DIY, but I just thought the beautiful wood (fake) on the example below was proof that murphy beds can actually be hidden and can even look classy. Okay this last one is probably also beyond the reach of a lot of basic DIY-ers but it was so clever, I had to include it. Basically the bed is set off from the rest of the room by a large screen on which he can project films to watch either from his bed or from the couch. Despite how sophisticated this is, it got me thinking that actually an old projection screen could make a great room divide. via. 1, 2, 3, 4, 5, 6 Jan 11, 2011
Wedding "Logo"
There's a reason marketing departments in companies everywhere spend millions on branding - in the mind of consumers and customers, it's VERY closely associated with who and what you're about. Logos are critical visual components of a brand. They are carefully designed and then used in as many places as possible to reinforce the brand.
This bride, featured on Green Wedding Shoes, talks about having a friend that designed their "logo" that they used on everything from bags to flags, and I even noticed they recreated it on their chalkboard sign :)
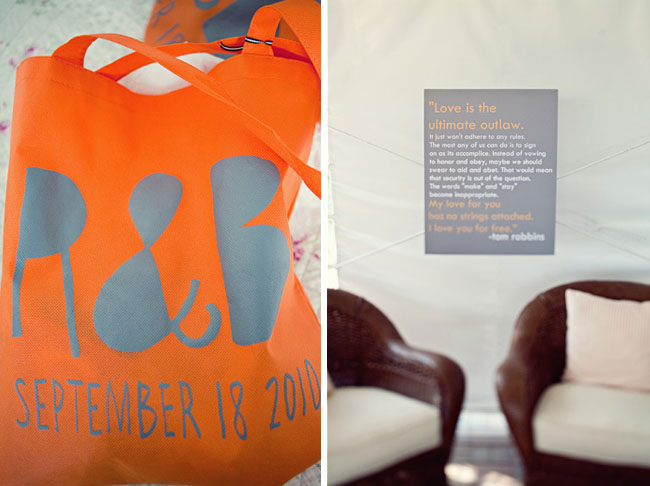


This one from Ruffled is a sweetly simple logo stamp. Thanks to M's tip from her wedding, you could look into having a custom stamp made at Paperwink:

What symbols or creatures could represent you or the style of wedding you are having? What kind of aesthetic communicates your style: modern and graphic, cute and cartoon-y, ornately vintage?
Also, if there's anything you want to see "crafted", leave a comment and I'll see what I can do!
So what does that have to do with a wedding? Well, not much really. But it DOES have to do with creating a memorable experience. It's also another excuse to make something beautiful and creative. Yay!
This one on 100 Layer Cake is adorable and you can definitely see how they reused their "icons" in lots of creative ways. It was clear from their photos that he is the beaker and she is the cupcake - so cute!:
This other one on 100 Layer Cake uses a familiar image (on the left), but tweaked for the couple. It basically leverages the Toulouse-Lautrec image already in your memory bank, which is very clever:
This one from Ruffled is a sweetly simple logo stamp. Thanks to M's tip from her wedding, you could look into having a custom stamp made at Paperwink:
Almost as soon as we set a date, I sat down and designed a small, 2"x2" linocut that I could use on various decorations. I didn't really occur to me until later that I had just created the logo for our wedding:
 |
| Filling up a box with seed favors featuring our "logo" print |
Also, if there's anything you want to see "crafted", leave a comment and I'll see what I can do!
Dec 21, 2010
Typewriter Guest Book
I've always felt that guestbooks are a great opportunity to do something a little bit different and out of the ordinary. Today, GB does a how-to on one of my favorite styles.
My darling cousin made our guestbook, but when I thought I would be doing something, I really liked the idea of a typewriter guest book. I found another blogging bride who shares her story of searching (and finding) a vintage typewriter for her wedding, as well as photos from a typewriter-themed wedding on Style Me Pretty.
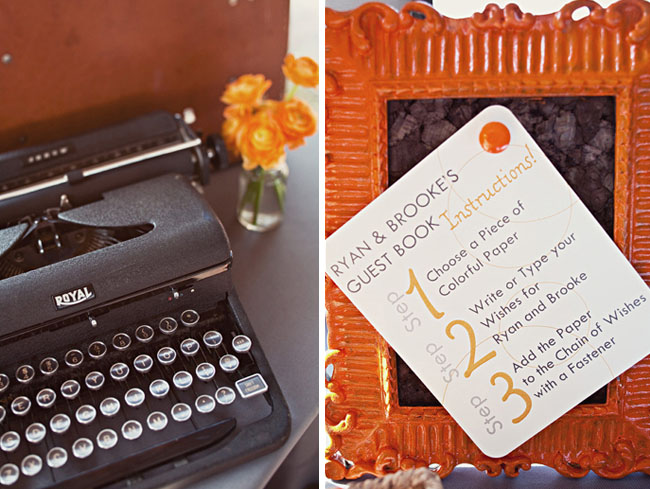 |
| Spell it out for your guests, like this wedding on Green Wedding Shoes |
This first collection of antique looking typewriters may not be functional enough for actually having guests try to use, but they are so decoratively beautiful, can we just look at them?
 |
| Upper left from Green Wedding Shoes; lower right and lower center from Ruffled; lower left from Ruffled |
These retro typewriters, however, are probably fully functional and still have tons of style:
 |
| Upper left from Ruffled; upper right from Green Wedding Shoes; lower right from Ruffled; lower left from Ruffled |
I did some searching around and there are a number of vintage typewriters for sale under $300 in the Bargain Basement of the Vintage Typewriter Shoppe. There are a number of affordable vintage ones on this vintage appliance site. My Typewriter has some very cute ones that are bit more expensive, but they also have supplies (and jewelry!) that might be useful. Of course, the easiest place to find an affordable vintage or retro typewriter is on eBay or your local thrift store. If you do go that route and want it to be functional for the guest book, give yourself enough time to give it a test run and take it for a tuning if necessary.
Dec 14, 2010
Wedding Maps
Time for some more fun DIY tips from the always delightfully clever GB. We didn't have a map at our wedding and I so wish that we did, so many people got lost!
Cartography is a lost art. First there was Rand McNally and now there's Google Maps. What's left to map?
Enter the subjective map: a map of a specific time and place. Like a wedding! Scale is not measured on physical distance but by emotional or temporal importance. In addition to being an opportunity to make something beautiful and clever, a map provides a very important function for guests (uh, where am I supposed to go now?). Some favorites:
 |
| Does this one from 100LayerCake make anyone else think they're in Disneyland? |
 |
| Polished, but endearing design in this wedding on Snippet & Ink |
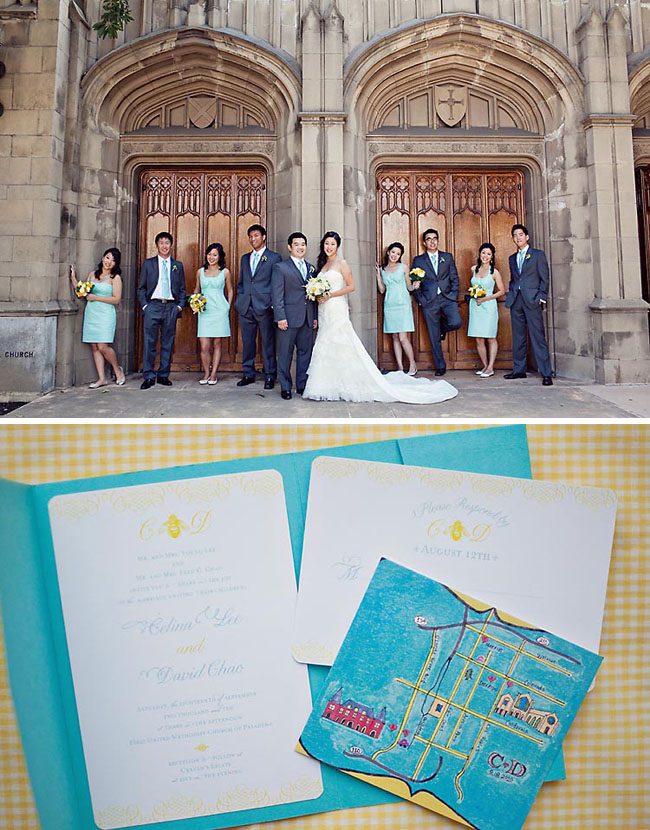 |
Wedding color saturated in this wedding on Green Wedding Shoes |
 |
| Subtle color in this wedding on Ruffled. |
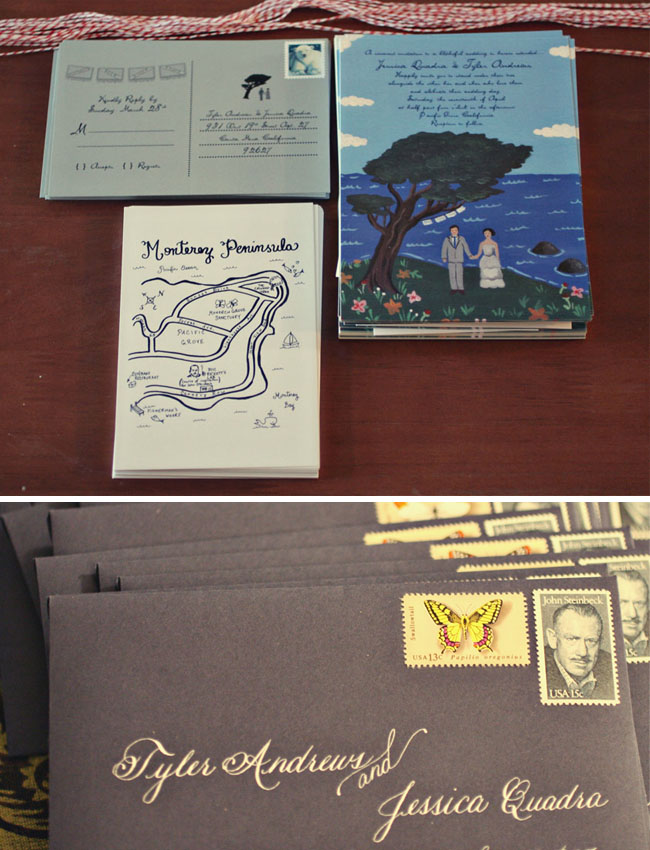 |
| Simple, black-and-white in this wedding on Green Wedding Shoes. |
 |
| Super cute map in this wedding on Ruffled |
If you're having your invitations custom printed, ask your designer or calligrapher about creating a map. For DIY options, if you're any kind of doodler, this is a chance to go nuts - and you can always trace key streets from a Google map. If colored pencils aren't your idea of fun, this bride gives detailed instructions for creating a map in Powerpoint.
Dec 10, 2010
Pinwheels, Part 2 - The Alternative Bouquet
Hi Everyone, GB has come up with another great DIY wedding post. You have to look at these ideas, they are so great and easy to do.
The Bouquet Situation: To fit our budget, I knew we were going to be skipping a professional florist and, as much as I would have loved to arrange our bouquets myself, I also knew that that kind of activity is very time sensitive and I didn't want to have that stress in the 36 hour window before the wedding.
Turns out there are a lot of fun alternatives to traditional flower bouquets (Green Wedding Shoes just did a feature on brooch bouquets). As discussed before, TD and I had pinwheel decorations in mind from early on, so that was a natural starting point.
Turns out there are a lot of fun alternatives to traditional flower bouquets (Green Wedding Shoes just did a feature on brooch bouquets). As discussed before, TD and I had pinwheel decorations in mind from early on, so that was a natural starting point.
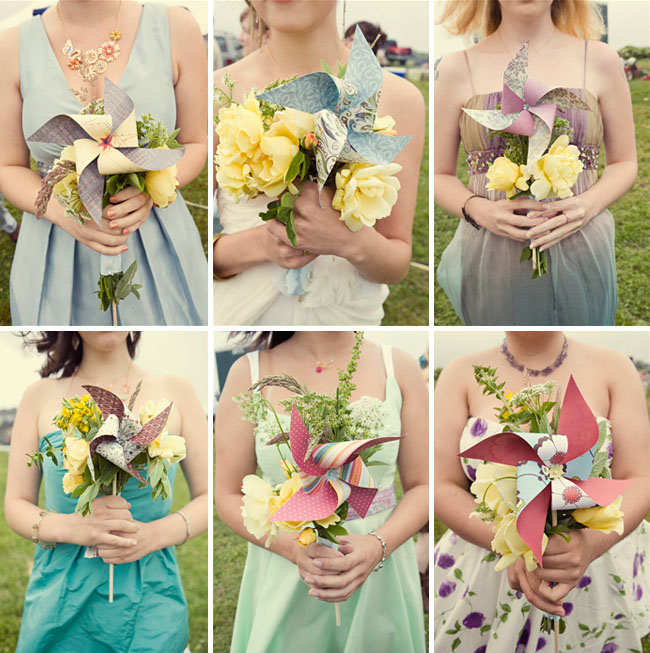 |
| I loved the pinwheels in these bouquets, featured on Green Wedding Shoes: |
 |
| State Farm Ribbon-style rosettes in this wedding on Ruffled |
 |
| Fan bouquets on Green Wedding Shoes |
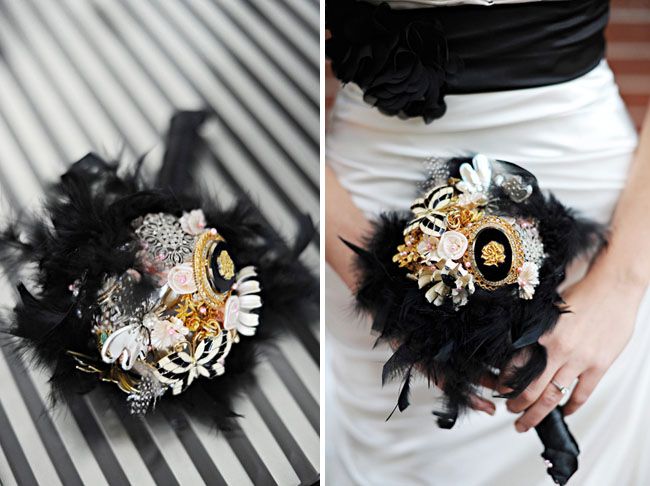 |
| I love the feathers and bling in this edgy-chic bouquet on Green Wedding Shoes |
 |
| Cute felt and button bouquet in this wedding on Ruffled |
I liked the idea of mixing flower shapes with pinwheels, so I started with the same pinwheel-on-a-dowel as the decorations I had made, and then added more pinwheels and tissue paper flowers with flexible pipe cleaners. Finally, I wrapped the dowel handle with satin ribbon.
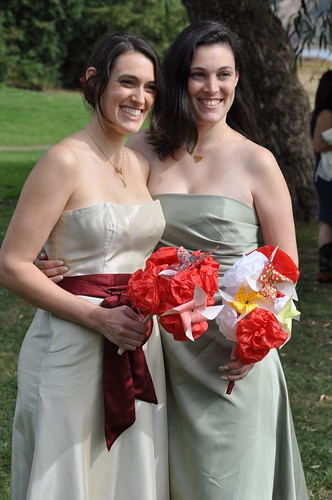 |
| Photo credit: Robbie G. |
Dec 7, 2010
DIY Hanging Lamps
I have a little problem (don't I always?): we need to hang a lamp over our dining room table, but the ceiling is impervious to screws and nails, and most lamps are too heavy for an adhesive hook. But I've come across two beautiful DIY lamps recently that look light enough to work. If I end up making one of them I'll definietly show you the results. 

Nov 30, 2010
Self-serve Refreshments
Today GB has some super helpful details for your own DiY wedding out there. I personally die for cucumber water. Why does it taste so damn good?
When you're going through the wedding planning process, you eventually hit the Wave of Practical Details. Among these are basic hydration arrangements for your guests... because dehydrated guests are not what you want. This may be part of your catering or venue package (and I recommend double checking that they have a plan), but if your wedding is outdoors or at all DIY then you probably need to figure out how your guests are going to wet their whistle with something other than whiskey and wine. This includes the standing around time BEFORE the ceremony. A self-serve beverage bar is an affordable alternative to paying for bar staff to come a couple hours early just to hand out water. While it's practical and low-budget, it doesn't have to look cheap.
Here's a couple of cute self-serve refreshment tables
 |
| A wide variety at this rustic wedding on Ruffled |
 |
| From a backyard wedding on Ruffled |
We borrowed a dispenser from a friend and bought another one to use and have around after the wedding. Keeping it simple, but with a touch of class, we served two flavored waters: orange and cucumber:
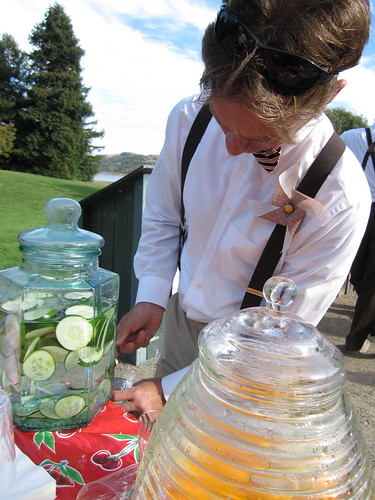 |
| Photo Credit: Torrey M F |
The creative opportunities here are labels for the beverages, decorations for the table, and the beverages themselves (um, anyone want to make horchata? Cause that sounds delicious). I made a cut-paper sign ("Refresh") and some festive oilcloth, which I bought by the roll here.
On the nuts and bolts side, it's a good idea to start researching available beverage dispensers early. Borrow as many as you can and give plenty of time for ordering any additional ones you need to buy as stores may not carry too many of these in inventory, if at all. Here's a little help on some research:
On the nuts and bolts side, it's a good idea to start researching available beverage dispensers early. Borrow as many as you can and give plenty of time for ordering any additional ones you need to buy as stores may not carry too many of these in inventory, if at all. Here's a little help on some research:
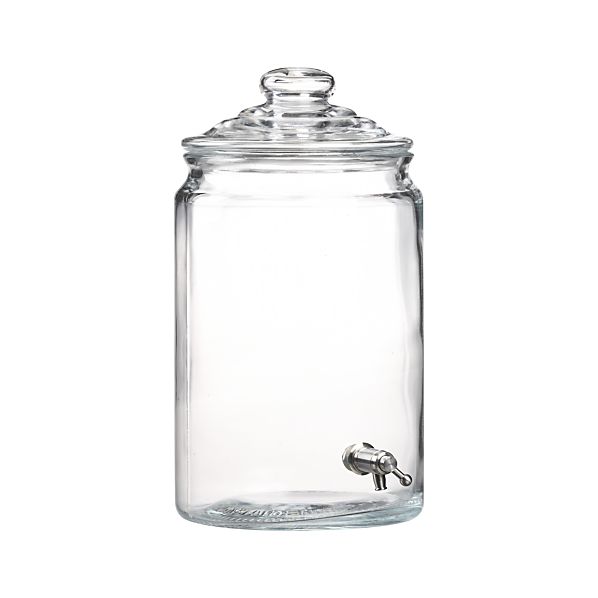 |
| $43 at Crate and Barrel |
 |
| $50 at Bed Bath and Beyond |
 |
| $60 on Amazon |
Nov 23, 2010
Cut-paper Signs
GB has some more great little DIY's from her beautiful wedding today. But I totally think these would be easy to do for a big thanksgiving party as well, don't you?
We already covered big chalkboard signs, which can either serve as big roadside signs to direct traffic or convey a ton of detailed menu information in one place. But there can be a need for lots of little signs, especially at an outdoor wedding, if only to label basic facilities or leave a message for guests.
First, a little sampling of small signs from weddings around the blogosphere:
 |
| Chalkboard in a frame on Ruffled |
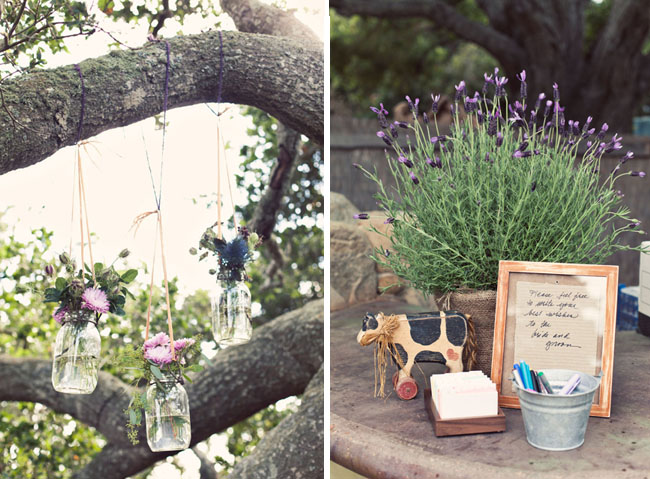 |
| Handwritten message in a frame on Green Wedding Shoes |
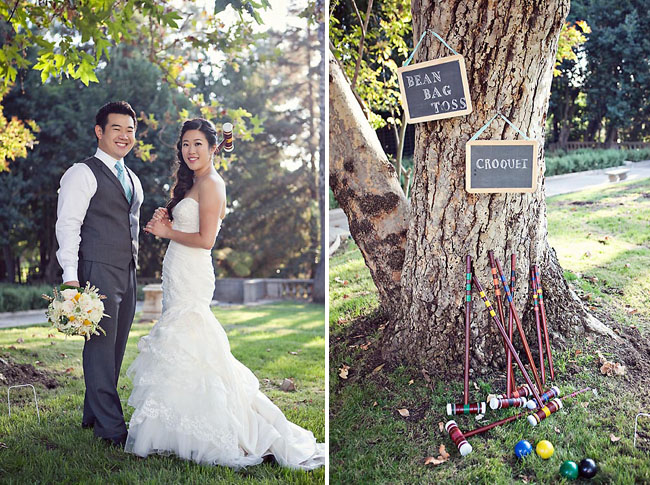 |
| Hanging framed chalkboards on Green Wedding Shoes |
I used the little signs to have some pops of color, using cut paper.


- First, I scoured some old magazines for full-page photos. A largely monochromatic image works best, or black and white photography. I got a little extra fancy by picking images that were relevant to what they would be conveying: I found a page of old-fashioned lined paper for our "guest book" sign since guests would be writing and for our "favors" sign, I found an image of growing crops since our favors were marigold seeds, etc.
- Next, I outlined where the letters would go BEFORE I started cutting. I find it helpful to center the middle letter(s) and work out from there. I also like to outline on the back side of the page to minimize markings, but that involves drawing the letters backwards, so use tracing paper if necessary.
- Then, I used a snap blade and cutting mat to cut out the letters. Tape a piece of construction paper underneath and trim any excess paper to fit into whatever sized frames you are using.
- BONUS step: Find some chunky frames at the thrift store and spray paint them to match the construction paper. Can't find chunky frames? Go to Ikea.
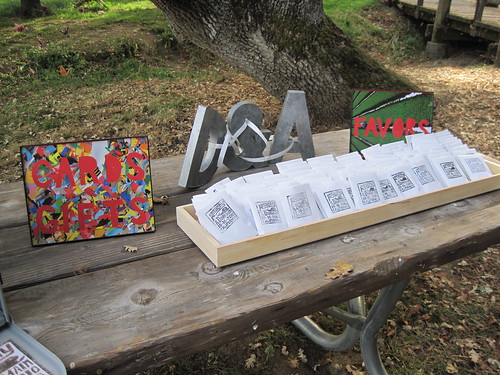 |
| Photo credit: Sara V |
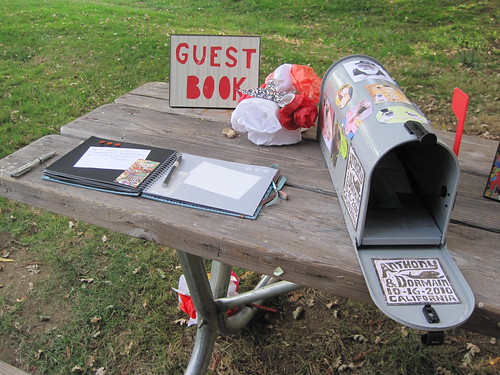 |
| Photo credit: Sara V |
Nov 16, 2010
Crane Mobiles
I really like origami paper. Not that big into actually folding origami, but the papers I see at the art store are always so beautiful that I've been known to buy a pack or two without any specific plans. Not so for the wedding - I had plans. Big plans. Plans that still, actually, didn't have anything to do with folding origami. But with some excess papers floating around, I thought I'd make a couple paper cranes to hang out around the wedding. Then I got some feedback from some savvy lady friends (no, not THAT kind of lady friend! Geez...) that a "couple" wouldn't do. Fortunately, they were willing to help me crank out, like, a couple hundred cranes. I was still a little skeptical of the flock of cranes.. until I saw this wedding on Ruffled:


OH! Now I get it! Gorgeous right? But, I can also see why you need HUNDREDS (or go for a cool thousand if you want to make a wish) because they do kind of need to be in a swarm to have any visual effect.
Then mere DAYS later (again on the wonderfully DIY friendly Ruffled wedding blog), I see this wedding (on the left):
 |
I love how the mason jars add some visual weight (and literal weight) to the mobile. Unfortunately, it seems like everyone and their mother uses mason jars in weddings these days (okay, I guess I was looking at A LOT of outdoor/vintage/diy weddings). That glass is also heavy and could complicate the structural integrity and I didn't want to have lit candles, but empty jars sound kind of... depressing. Then I happened to be poking through the Ikea web catalog and found these:

Perfecto! Oh, and you only want $4 for these adorable lanterns? Um, okay, I'll take a dozen!
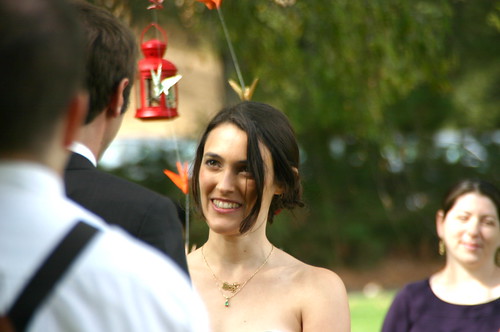
So, we strung up the cranes with fishing wire onto some wooden dowels, with the lantern hanging from the center to keep it balanced. And that's the story of how we made these crane mobiles.
 |
| Photo credit: Ian KB |
Now I just wish I had a backyard with willow trees to hang them from permanently. When I look back at photos from our ceremony, I love how the mobiles dreamily found their way into some frames:
 |
| Photo credit: Ian KB |
BONUS: We also used some lanterns as center pieces, with a little crane tucked inside:
 |
| Photo credit: Julia C |
Mobiles are kind of awesome in general - they essentially decorate THE AIR. Not a table, not a wall, just airspace. One tip though: keep those little birdies paper-clipped together from early in the construction process or you will have one big, tangled mobile mess on your hands when you try to set them up. I transported each mobile in it's own brown grocery bag (they're free for now!), which I think saved a ton of hassle.
Happy folding!
Subscribe to:
Posts (Atom)


 Posts
Posts


